You’ve made a character sheet with every angle, a dozen expressions and a row of tiny faces. Then you use it to generate a video, and the character comes back with a different nose.
Before adding another reference, look at what is already on the sheet. A face in a full-body view can disagree with the face in the close-up. An expression grid can give the model several slightly different versions of the same person. All of those pictures become part of the reference you hand over.
For human characters, our current workflow uses two large face close-ups and two outfit views, all on grey. Here is how to build it in WunderNode, including the prompt.
Give each panel one job
Start with a 16:9 landscape canvas at 4K. Divide it into four equal vertical panels in one horizontal row, with thin white gutters.
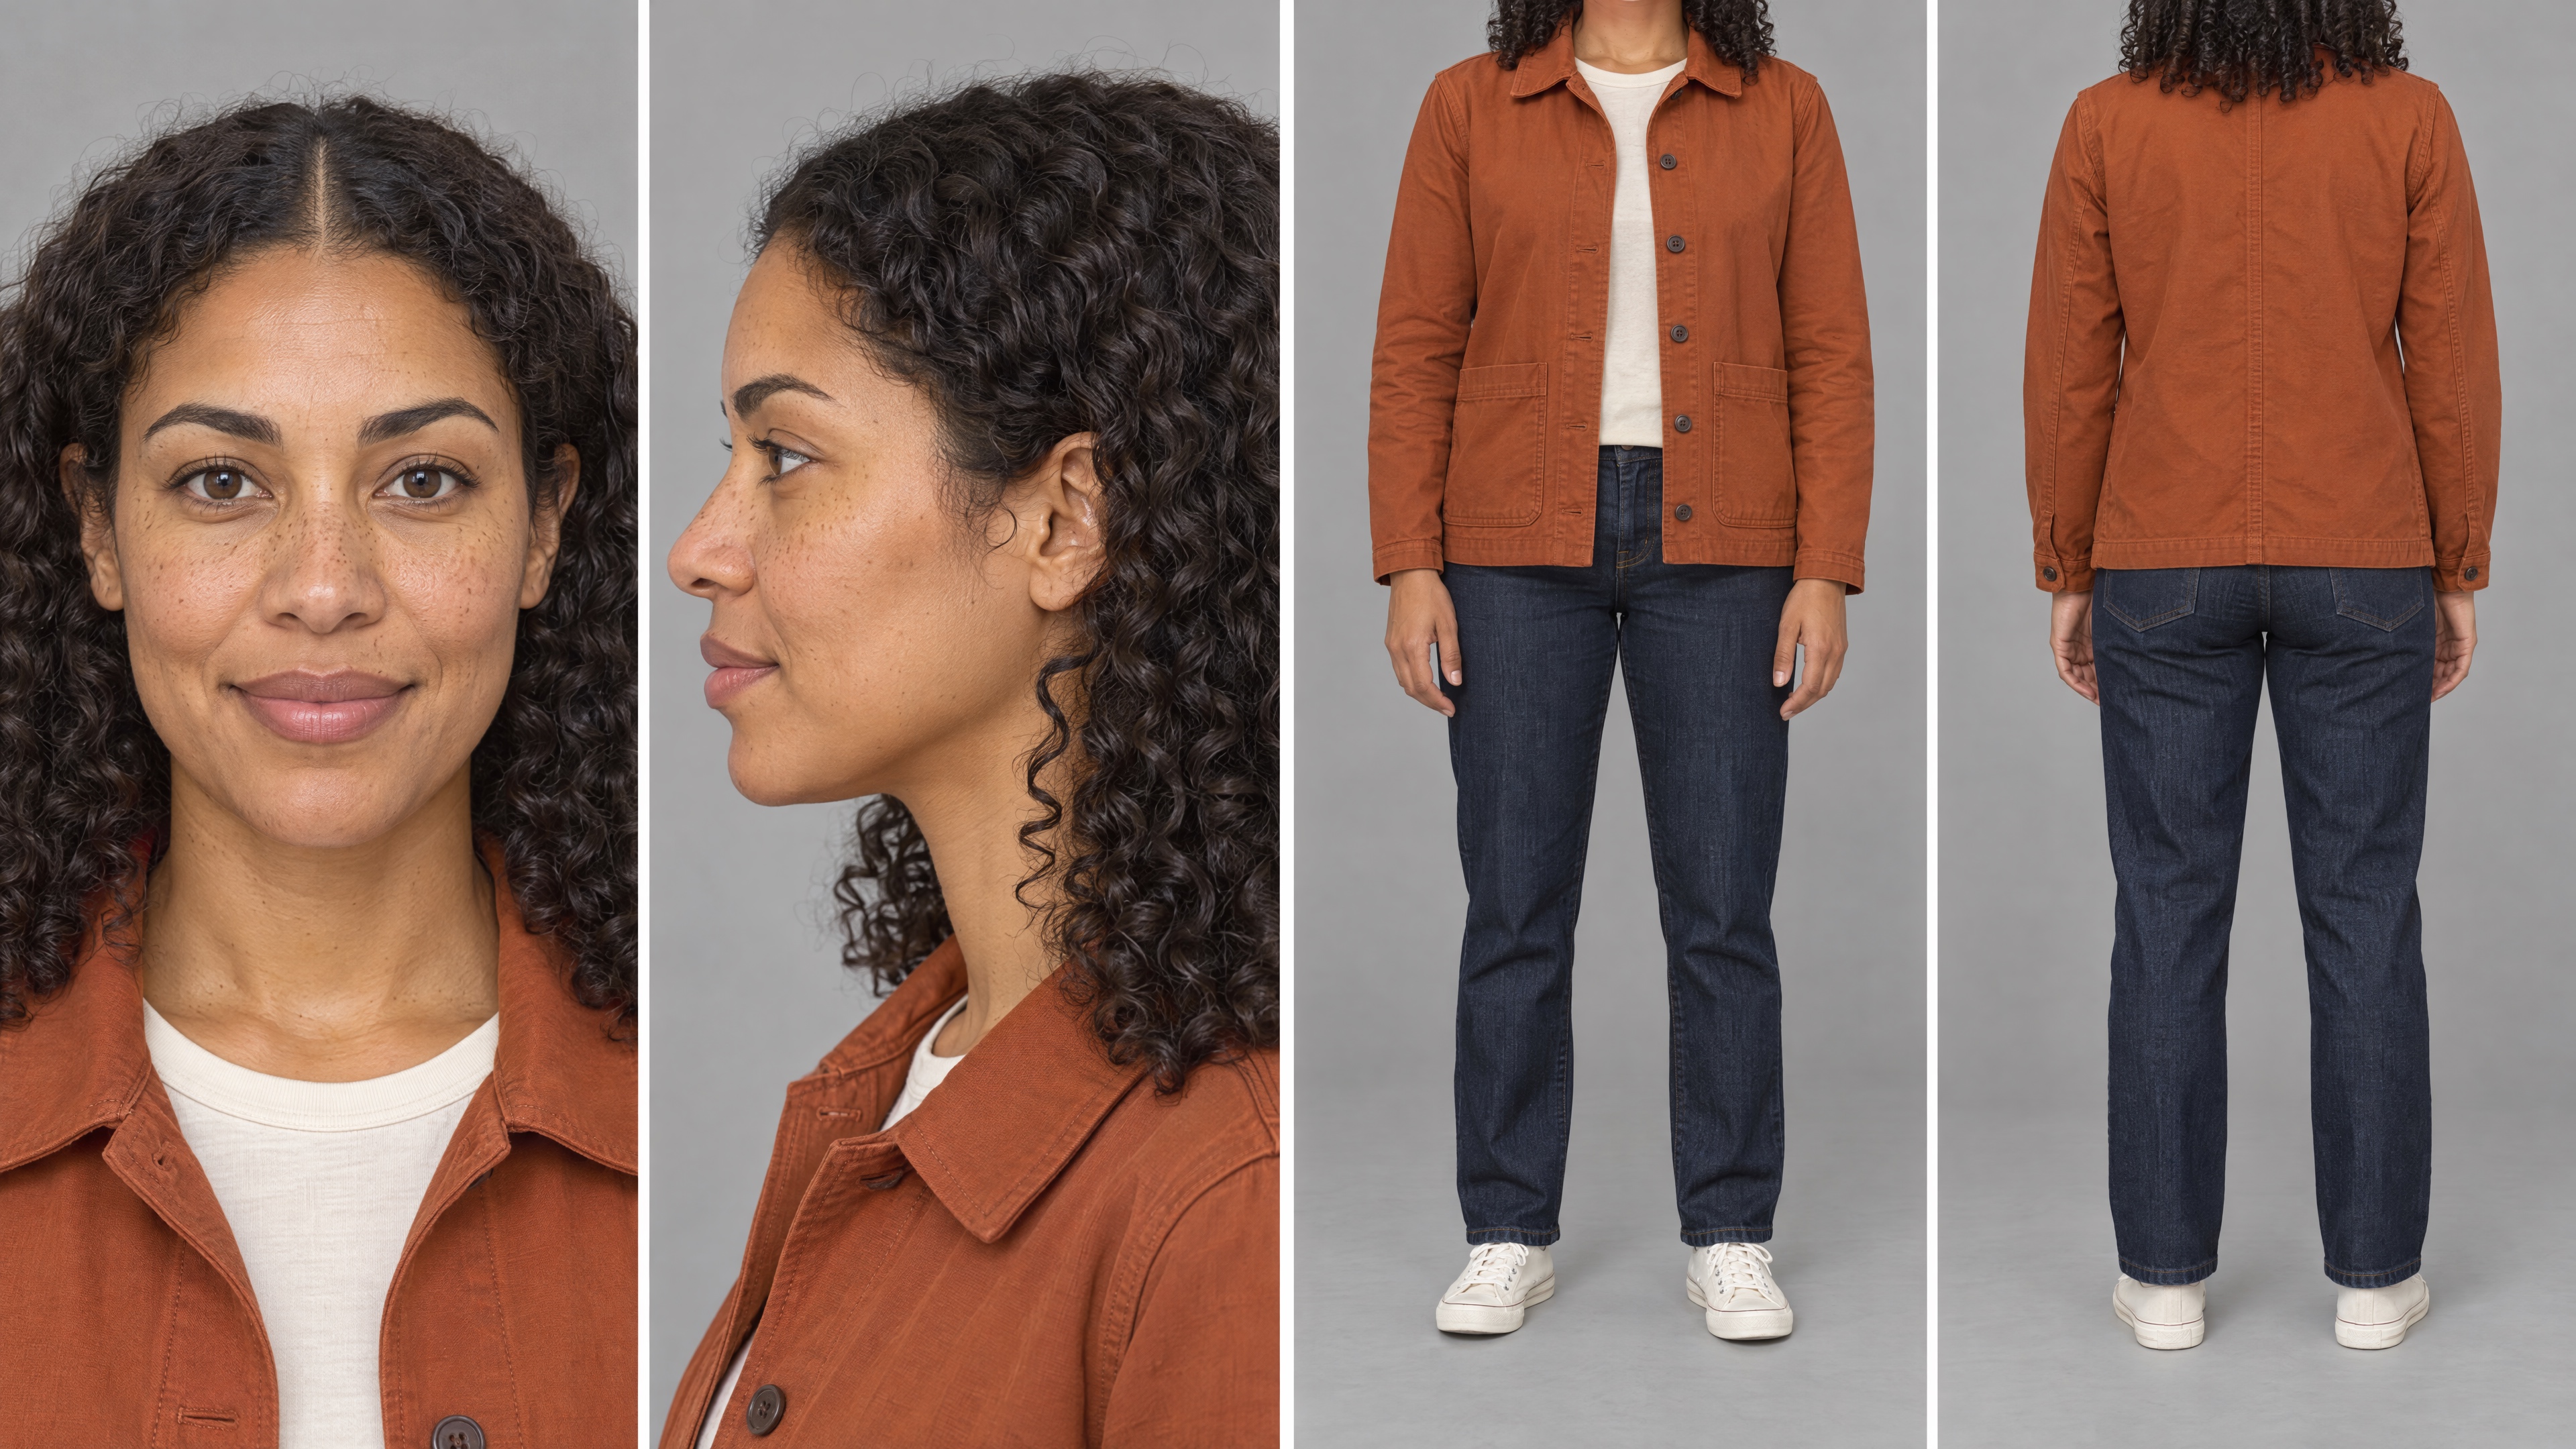
Generated in WunderNode for this guide. The first two panels carry the face. The last two carry the outfit and body proportions.
Read the sheet from left to right. Panel one is a straight-on face close-up, framed from just above the hair to the upper chest. Both eyes look into the lens. Keep the head level and the expression calm.
Panel two is a true 90-degree profile at the same scale. You should see one eye and a clear outline of the forehead, nose, lips and chin. A three-quarter portrait does not show the same information.
Panel three shows the outfit from the front, from the base of the neck down to a strip of floor below the shoes. Panel four uses the same crop from the back. Keep the arms relaxed at the sides so you can read the sleeves, waist and garment shape.
The three-panel version uses one face close-up plus the front and rear outfit views. Our current four-panel layout adds the profile close-up, which gives you a large reference for the side of the face without shrinking it into another full-body view.
Crop the head out of the outfit views
This is the detail that is easiest to miss. The front and rear body panels should start at the neck. The head sits entirely outside the frame.
A small face in a full-body panel has little room for the details you care about. If its eyes, mouth or nose differ from the close-up, you have handed the next generation conflicting references. Cropping at the neck removes those extra versions of the face.
Describe the crop physically in the prompt:
The top edge of the frame cuts across the neck, so the head and face are entirely outside the frame. The collar is the topmost thing visible.
That is clearer than asking for a “headless character,” which leaves the model to decide what you mean. Keep the shoes inside the bottom edge, too. A sheet that cuts off the footwear leaves part of the outfit undefined.
Use neutral grey and soft light
Use the same light-to-mid grey background in every panel, around #b0b0b0. In the outfit views, let it continue beneath the shoes without a white floor strip or a visible horizon.
Grey gives you a neutral setting for checking skin, fabric and shadows. A pure white backdrop can encourage a bright catalogue look that you then have to undo when making a scene. It also makes the edges of pale clothing harder to judge.
Background colour is only part of this. For natural-looking skin, ask for soft frontal light, gentle fill, visible pores and slight variation in skin tone. Remove beauty retouching, waxy smoothing and exaggerated sharpening from the look you request. Grey alone will not fix plastic-looking skin.
Two character-sheet layouts to avoid
The crowded dossier
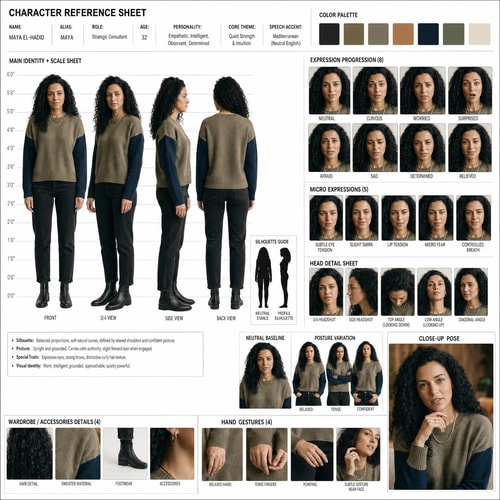
The face appears repeatedly at different sizes, alongside expressions, hand gestures, colour swatches and written notes.
This layout packs many useful production ideas into one image. As a single input for character consistency, though, it gives each view very little space. The expression thumbnails compete with the large portrait, and the full-body figures introduce more small faces.
Keep the identity sheet focused on the face and outfit. If a scene needs a specific expression or hand gesture, make a separate reference for that shot. Written biography and palette notes can stay in your production notes.
The wall of faces
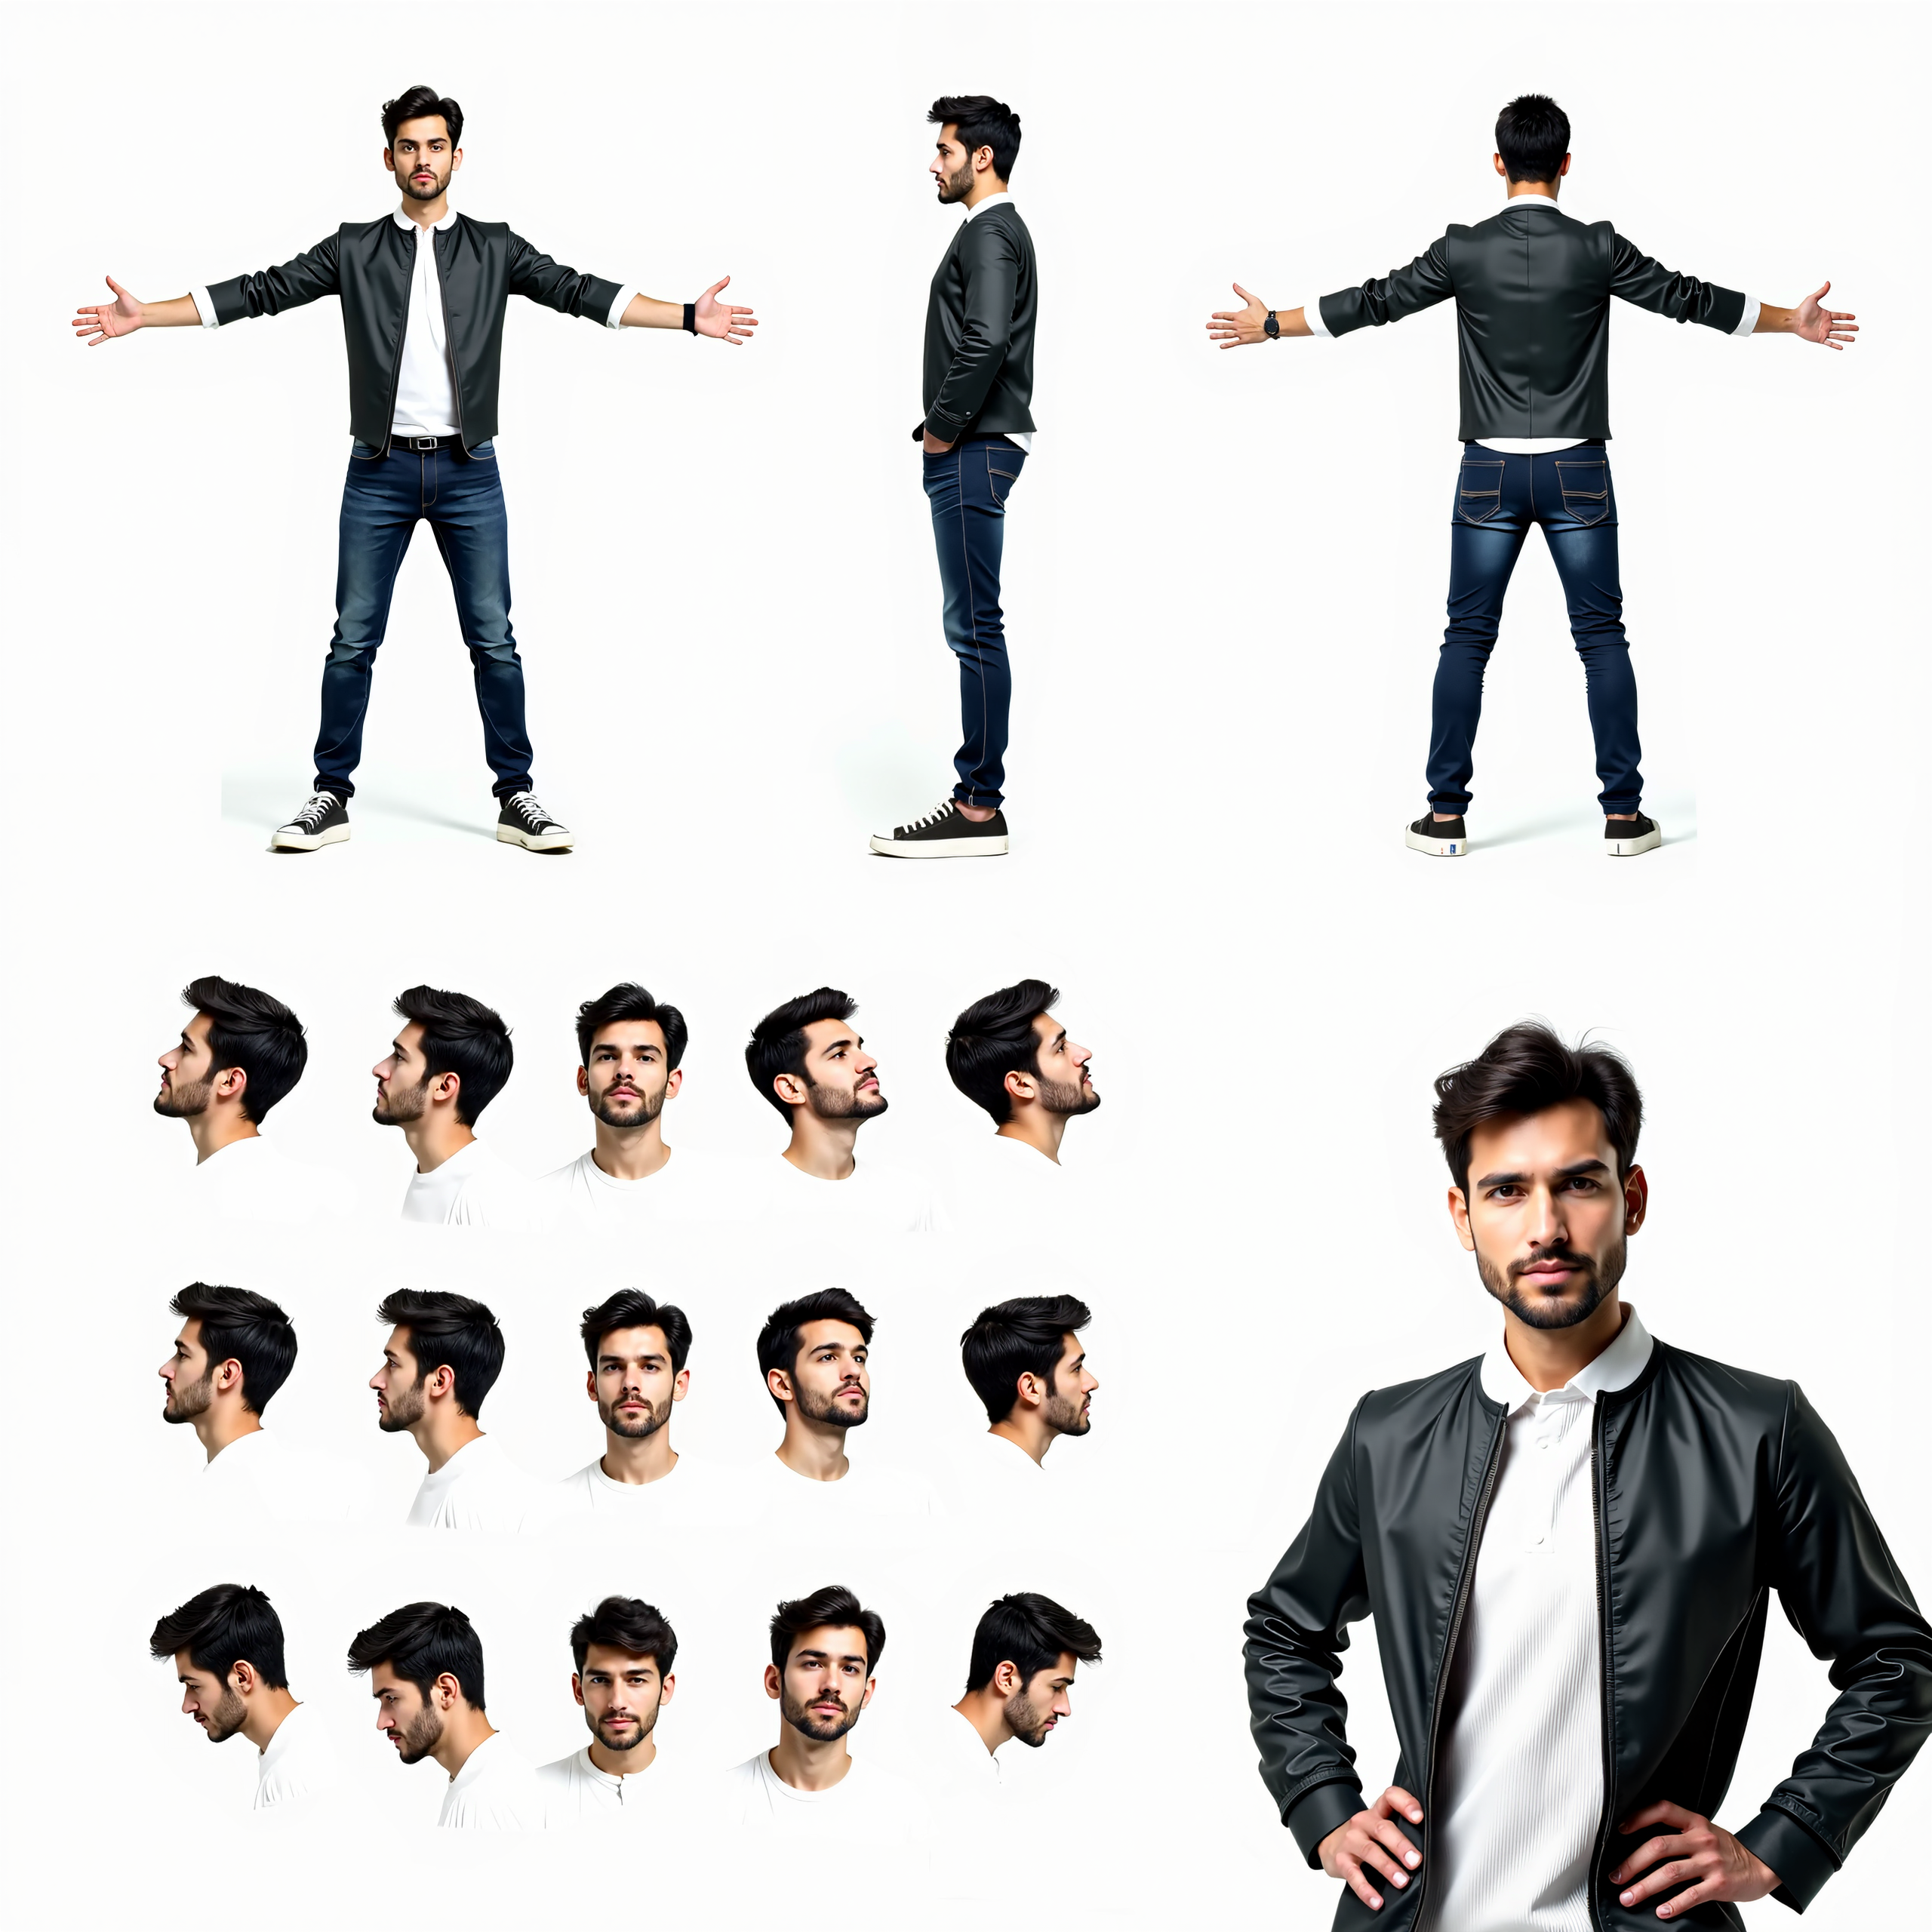
Many face angles share the canvas with full-body views and one large portrait.
Here, the large portrait has to share space with fifteen small head views and three full-body figures. The top row also changes pose between views: arms spread in the front and rear, hands in pockets in the profile. That makes it harder to compare how the same outfit sits on the body.
Use one frontal close-up and one profile close-up. Give the outfit views matching, relaxed poses. You can see whether the references agree without inspecting a grid of tiny faces.
Build the sheet in WunderNode
For an existing character, start with clear photographs. Add them as Image inputs, then connect them to an Image Editor. If the outfit matters, add separate garment and shoe photographs after the identity references. Keep a record of that order so the prompt can refer to the correct images.
On the Image Editor, select GPT image 2.5 [Sunburst], set Image Size to 16:9 landscape 4K, and set Quality to Max. Connect the result to an Image display so you can inspect it on the canvas.
For a fictional person with no photographs, use Text to Image with GPT Image 2.5 [Sunburst] and the same size and quality. Describe the face in full. That is how we made the rust-jacket example above.
Generate one sheet, inspect it, then revise it if needed. Batch generation makes little sense while you are still checking the layout or deciding what the character looks like.
Copy this character-sheet prompt
Attach the character photographs first. Replace the bracketed identity and clothing descriptions, and name the reference images in the order you connected them. If you have no outfit photographs, describe the clothes, including the shoes.
Create a photographic character reference sheet with four equal vertical
panels side by side in one horizontal row, separated by thin white gutters.
Use the same seamless neutral light-to-mid grey background, around #b0b0b0,
in all four panels. Grey continues beneath the shoes.

IDENTITY: Use the person in Images [1–N] as the identity reference.
Preserve their age, face shape, eyes, eyebrows, nose, mouth, skin tone,
hairline, hair texture and hair length. Their distinguishing features are
[describe two or three visible features]. Keep this same person in every
panel. Do not beautify or stylize their features.

CLOTHING: [Describe each garment, its fabric, colour, collar, closures,
trim, sleeve length and fit. Include the shoes. If outfit photographs
are attached, identify their image numbers here.]
The same outfit is worn on the body in all four panels. Fabric takes its
shape and creases from the body underneath. In the close-ups, only the
neckline and collar appear at the bottom of the frame.

LIGHT AND SKIN: Soft frontal key light, gentle fill and natural falloff.
Natural skin tone, subtle pores and slight unevenness. Photographic detail
at normal viewing size. No airbrushing, waxy skin, beauty filter, crunchy
sharpening or HDR look. Same lighting in every panel.

PANEL 1: Straight-on face close-up, from just above the hair to the upper
chest. Head level, nose centred, both eyes looking into the lens.
Calm expression with a small closed-mouth smile.

PANEL 2: True 90-degree left-side profile, at the same close-up scale.
Head and shoulders turned fully sideways. One eye visible. Clear outline
of the forehead, nose, lips and chin against grey.

PANEL 3: Front outfit view, standing straight, arms relaxed at the sides,
hands open, feet slightly apart and flat on the floor. Frame from the
base of the neck to a strip of grey floor below the shoes. The top edge
cuts across the neck, so the head and face are entirely outside the frame.
The collar is the topmost thing visible.

PANEL 4: Rear outfit view. Same stance and crop as panel 3, turned fully
away. Show the back of the clothes and shoes. The top edge again cuts
across the neck, with the head entirely outside the frame.

Same person, hair, outfit, background and lighting throughout.
No three-quarter views, text, labels, watermark or decorative border.
For a fictional character, replace the photograph-based identity paragraph with an explicit description of the person. Keep their age, face shape, features, skin and hair consistent across every panel.
Check the sheet before using it
Open the full-resolution image and compare the two face panels. Check the nose profile, jaw, eye colour, hairline and age. For a real person, compare both panels with the original photographs as well.
Then check the outfit front and back. Look at sleeve length, pockets, fastenings, hems and shoes. Confirm that the neck crop holds in both body panels and that neither pair of shoes has been cut off. A polished image can still contain a changed garment.
If one thing is wrong, revise the instruction for that defect and generate again. A profile that keeps turning toward the camera needs a clearer angle instruction. An outfit that keeps changing needs another look at the clothing references. Keep the original photographs available rather than judging each new sheet only against the previous generated one.
Give important props their own sheet
If a bag, instrument or product must stay consistent, make a separate sheet for it. Put one object in each view and show the details that identify it. Holding the prop in every character panel mixes its shape and position into the character reference.
A worn accessory that stays on throughout the film can remain on the character sheet. Something the character picks up, removes or changes belongs in its own reference.
Use the approved sheet in the next generation
Attach the approved sheet to each image or video generation that shows the character, including the stills you use to establish a scene. Keep the original identity photographs and any product photographs available as references, too.
Tell the next node which source carries which detail:
Use panels 1 and 2 of the sheet and the original photographs for the face. Use panels 3 and 4 for body proportions, posture and how the outfit is worn. Use the product photographs for garment details.
For a costume change, edit the approved sheet, keeping the identity fixed and changing the clothing description. Inspect the new version before using it in a scene.
You can build this workflow in WunderNode. For the next steps, including scene references and continuity between clips, read How to Make an AI Short Film.